
4.64 out of 5 · 295 Google reviews
4.64 / 5 · Google
295 reviews across Milton & Scarborough.
How to Floss Your Teeth Properly
To floss, wind about 45 cm of floss around the middle fingers of both hands, guide it gently between two teeth, then curve it into a C-shape against the side of one tooth and slide it just below the gum line. Wipe up and down, repeat on the neighbouring tooth, and unwind a fresh section for each space — including behind your last molars. Some bleeding is common when you first start and usually settles within one to two weeks.

Orion Dental Team
Led by Dr. Fahimay Naqvi
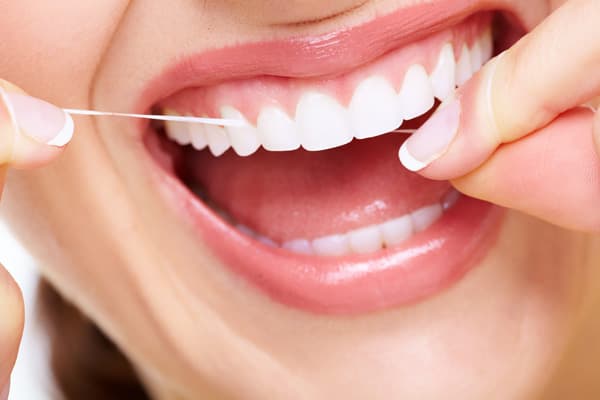
Your toothbrush cleans the front, back, and chewing surfaces of your teeth — but it cannot effectively reach the tight spaces between teeth or just below the gum line. Those contact surfaces between your teeth are exactly the territory that floss is designed to clean.
At Orion Dental in Scarborough and Milton, our hygienists walk patients through proper flossing technique at every cleaning appointment. This guide captures those same instructions so you can practise at home with confidence.
Between
surfaces only floss reaches
45 cm
of floss per session (18 inches)
1x
daily minimum recommended
2–3 min
to floss all teeth properly
Step-by-Step Flossing Technique
Proper flossing takes a little practice, but once you've learned the motion it becomes second nature. Follow these steps each time you floss:
The Proper Flossing Technique
Step 1: Cut the Right Length
Pull out approximately 45 cm (18 inches) of floss. Wind most of it around the middle finger of one hand, and a small amount around the middle finger of the other hand.
Step 2: Hold with Control
Pinch the floss between your thumbs and index fingers, leaving about 2–3 cm (1 inch) of floss taut between them. This gives you control and precision.
Step 3: Slide Gently Between Teeth
Guide the floss between two teeth using a gentle back-and-forth sawing motion. Never snap or force it — this can injure the gums.
Step 4: Form a C-Shape
Curve the floss into a C-shape against one tooth. Slide it gently into the space between the gum and tooth until you feel mild resistance.
Step 5: Wipe Up and Down
Holding the C-shape, move the floss up and down along the side of the tooth. Repeat on the adjacent tooth before moving to the next space.
Step 6: Use Fresh Floss
As you move from tooth to tooth, unwind a fresh section of floss. Used sections carry bacteria and debris that you don't want to transfer.
Don't Forget the Back Teeth
Many patients stop flossing at the last visible tooth. Make sure to also clean behind your very last molars — curve the floss around the back surface. These areas are especially prone to plaque buildup and decay.
Choosing the Right Type of Floss
Not all floss is the same, and the right choice depends on your teeth, any dental work you have, and your personal preference. Here's how the main types compare:
| Type | Characteristics | Ideal For |
|---|---|---|
| Waxed nylon | Slides easily; less likely to catch on rough edges | Tight contacts, crowded teeth |
| Unwaxed nylon | Thinner; slightly better plaque grip | Normal spacing, patients who prefer a thinner feel |
| PTFE (monofilament) | Single strand; virtually shred-resistant | Rough restorations, tight spots that shred other floss |
| Dental tape | Wider and flatter than standard floss | Wider gaps between teeth, bridges |
| Floss picks | Pre-threaded on a plastic handle | Patients with limited dexterity or on the go |
| Water flosser | Pressurised water stream removes debris | Braces, implants, bridges, dexterity challenges |
If you have dental work such as crowns or bridges, dental implants, or Invisalign aligners, your dental team may recommend a specific type of floss or an alternative tool such as a threader or interdental brush.
Common Flossing Mistakes to Avoid
Even patients who floss regularly sometimes use a technique that limits their results — or worse, causes gum irritation. Watch out for these common errors:
Mistakes to Avoid
- Snapping the floss down into the gums — this causes injury and discourages you from flossing
- Using the same section of floss for multiple teeth — you're just spreading bacteria around
- Sawing back and forth without the C-shape curve — you miss the plaque below the gum line
- Only flossing visible front teeth — back molars need attention too
- Flossing too aggressively when gums are sore — be gentle and consistent instead
- Skipping flossing when your gums bleed — bleeding usually means you need to floss more, not less
- Using too short a piece of floss — short floss is harder to control and leads to poor technique
Want a Hands-On Demo?
Our hygienists can walk you through the proper technique at your next cleaning.
Flossing in Special Situations
Flossing with Braces
Orthodontic treatment makes flossing more challenging, but also more important. Brackets and wires create additional surfaces where plaque accumulates. Use an orthodontic floss threader to guide floss under the archwire, then floss each tooth using the standard C-shape technique. A water flosser is an excellent companion tool during braces treatment.
Flossing Around Implants and Bridges
Dental implants and bridges have unique anatomy that requires adapted cleaning techniques. Use floss threaders, super floss, or interdental brushes to clean around implant abutments and beneath bridge pontics. Your dental team will demonstrate the specific approach for your restorations.
Flossing for Children
Parents should begin flossing their child's teeth as soon as two teeth touch each other — typically around age two or three. Use child-sized floss picks or a short length of floss wrapped around your fingers. By age eight to ten, most children can learn to floss independently with supervision. Our children's dentistry team is happy to teach your child the proper technique.
Why Flossing Matters for Your Health
Flossing isn't just about preventing cavities between teeth — though it certainly helps with that. Regular flossing plays a critical role in maintaining healthy gums. When plaque is left between teeth, it hardens into tartar within 24 to 48 hours. Tartar below the gum line triggers inflammation, which is the starting point of gum disease.
Prevents Cavities
Removes the plaque between teeth that causes interproximal decay — the most common location for new cavities in adults.
Protects Your Gums
Daily plaque removal keeps gum inflammation at bay, reducing your risk of gingivitis and periodontitis.
Freshens Your Breath
Trapped food and bacteria between teeth are a primary source of bad breath. Flossing eliminates these odour producers.
Saves Money Long-Term
Preventing cavities and gum disease with daily floss is far less costly than treating them with fillings, deep cleanings, or extractions.
A Habit Worth Building
Cleaning between your teeth every day keeps the contact surfaces free of plaque— which is where cavities and gum problems often begin. If you're not flossing yet, start with just a few teeth each night and build up — even partial flossing is better than none.
Make Flossing Part of Your Daily Routine
The key to effective flossing is consistency and proper technique— not speed or force. Once you've developed the C-shape motion and made it a daily habit, flossing your entire mouth takes only two to three minutes.
Need a personalised flossing demonstration? Our hygienists are happy to help at your next cleaning appointment. Visit us at our Scarborough or Milton office. Book an appointment or call 416-291-0306 (Scarborough) / 905-636-9770 (Milton).
Frequently Asked Questions
Common questions about flossing
How often should I floss?
At least once per day. Many dental professionals recommend flossing before your evening brushing, but the most important thing is consistency — pick a time that works for your routine and stick with it.
Should I floss before or after brushing?
Flossing first may help fluoride from your toothpaste reach between the teeth. Either order is fine — doing both consistently matters more than the sequence.
Is it normal for my gums to bleed when I floss?
Some bleeding is common when you first start flossing or after a break. It typically improves within one to two weeks of daily flossing. If bleeding persists beyond two weeks, schedule a dental checkup — it may indicate early gum disease.
Are water flossers as effective as string floss?
Water flossers can be a good alternative, particularly for patients with braces, bridges, or limited dexterity. They can be effective at removing plaque and keeping gums healthy. Your dentist can help you determine the right tool for your situation.
What type of floss should I use?
Waxed floss slides more easily between tight contacts. Unwaxed floss may grip plaque slightly better. PTFE (monofilament) floss resists shredding. The right choice depends on your tooth spacing and personal preference — ask your dental hygienist for a recommendation.
Can I floss with braces?
Yes, but it requires a floss threader or orthodontic floss to navigate around the wires. A water flosser can also be helpful. Maintaining flossing during orthodontic treatment is especially important since brackets create additional plaque traps.
Related Articles
Continue reading about dental health
Our Patients Ask: Should I Brush or Floss First?
Get the most from your daily routine — learn the evidence behind brushing and flossing order.
Read moreBad Breath: Causes, Prevention & When to See a Dentist
Flossing plays a key role in preventing bad breath. Learn about all the causes and solutions.
Read moreCavities: How They Form and How to Prevent Them
Understand how cavities develop and the role flossing plays in keeping them at bay.
Read more